‘Book Mystique Review - Photoshop Elements 8.0
Wednesday, November 4, 2009
by Charles W. Moore
About a month ago, I posted here a first look profile of Photoshop Elements 8.0. I wanted to spend some time with the program before writing a full review, and in the meantime I’ve continued using it.
Nothing I’ve encountered with this new version has changed my opinion that Photoshop Elements is really in a class by itself in terms of consumer-level image editing programs. There are some quite decent challengers being developed-- Pixelmator being the most impressive IMHO -- Flying Meat’s Acorn is coming along nicely as well, and Ohana Software’s entry Funtastic Photos has the advantages of being different and very user-friendly, but nothing else is yet even in the same neighborhood compared to what Elements offers in a package that is concededly somewhat more expensive, but unless your image editing needs are relatively modest, I think the extra cost is more than justified.
It’s not that the other consumer-level programs don’t do a good job at what they do, but rather, simply, that none of them do nearly as much as Photoshop Elements does, and that’s an understatement. The really impressive comparison is with Adobe’s own much more expensive Photoshop CS4. You get a high percentage of the pro application’s functionality at a small fraction of the cost.
Another big advantage, especially for users like me who are not terribly smitten with Apple’s iPhoto application, is that the Mac version of Photoshop Elements 8.0 ships with Adobe’s bridge CS4 photo browser, cataloger and organizer application bundled, which, if you’re inclined to use it, means you’re essentially getting two very useful applications for the price of one.
I continue to get a fair bit of mail from people inquiring as to whether there are any good alternatives to iPhoto, and for me at least, that comparison is a no-brainer. The Bridge is a much more satisfactory solution than iPhoto. I’ll get back to that in a bit.
If you’re an Elements fan, it’s notable that this time around Adobe released the Windows and Mac editions of version 8 almost simultaneously, although version 7 was skipped entirely for the Mac, as was version 5. Hopefully that pattern won’t continue, and eventually there will be a timely release of version 9 for the Mac as well. But that’s getting ahead of ourselves.
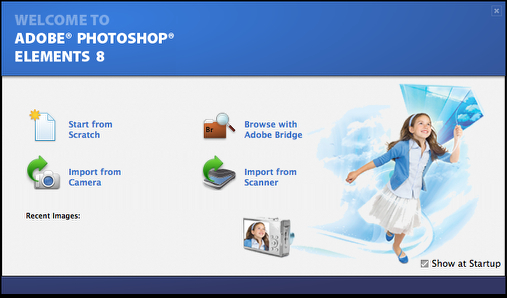
Installing Elements has never been one of the more pleasurable aspects of the program, and neither is it with version 8.0, but at least the process goes a little faster than it did with version 6.0. A disk image drag-and-drop application install would be a major improvement. As it stands, you have to run an installer, then type in a really long serial number. At least that all should be a one time aggravation. Happily, if you have a previous version of Photoshop Elements installed, you don’t need to uninstall it, and version 8.0 starts up quicker than you’re used to with version 6.0.
PSE 8.0 is not a radical departure from version 6.0, especially given the two number version update, and veteran users should have no problem acclimatizing. Most things work pretty similarly to the way they did in the previous version. I’m not sure that I like the revised interface appearance better, but it’s functional and gets the job done, and now uses Photoshop CS4’s panel interface that supports tabbed documents, if that’s something that appeals.
There’s also a preferences setting that allows you to choose between a default dark gray appearance theme and a lighter gray that I personally prefer, although I think Pixelmator’s dramatic jet black beats both for aesthetic appeal.
So what else is new? Well, one very important change is that version 8.0 supports OS X 10.5.6 Snow Leopard. I’m still running Leopard 10.5.8, but PSE 8.0 will make that part of the transition painless when I upgrade the operating system. Photoshop Elements 8 for Mac now includes all of the intelligent photo-editing options that the Windows version does. In addition to Photomerge Exposure, Recompose and Quick Fix previews, Version 8.0 for Mac features a Scene Cleaner for brushing away unwanted elements.
PSE 8.0’s Quick Fix feature has been tweaked to perform a full range of common photo-optimization adjustments with one click. In addition to red-eye and skin tone correction, Adobe has included more adjustments, such as whitening teeth and making skies bluer, that will apply only on portions of the photo the user specifies, and which can also be applied as effects presets with PSE 8.0’s new Smart Brush as well.
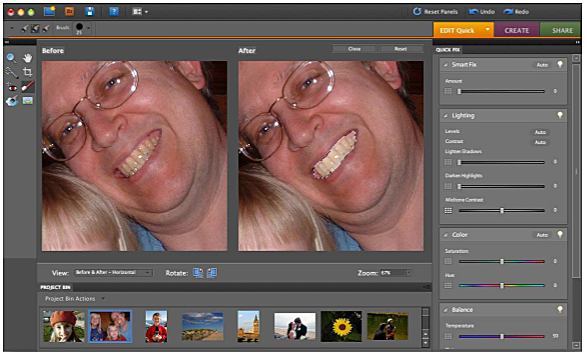
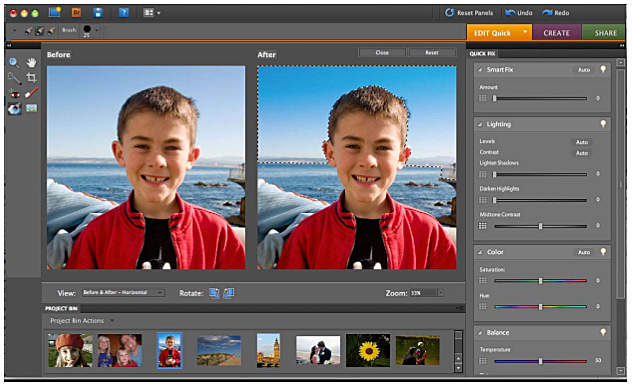
You can also quickly preview a range of adjustments in order to achieve the exact look you’re after. The Quick Fix previews window contains sliders to make additional fine-tuning adjustments to photos easy and convenient, and with a nod to neophyte users, it’s now possible to determine the most desirable adjustment without knowing what the sliders do.
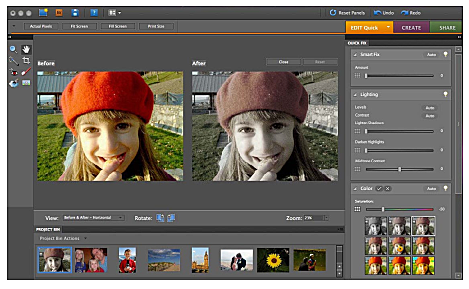
When you perform one-step fixes -- including adjustments to color, contrast, and lighting -- you can visually choose the result you like best from a selection of adjustment previews.
Photoshop Elements 8’s new Automated Actions provide shortcuts to a variety of effects and actions, including Faded Ink, Lose Weight, Resize and Crop, and Captions, saving time by combining a series of tasks and helping to consistently reproduce effects you like on multiple photos.
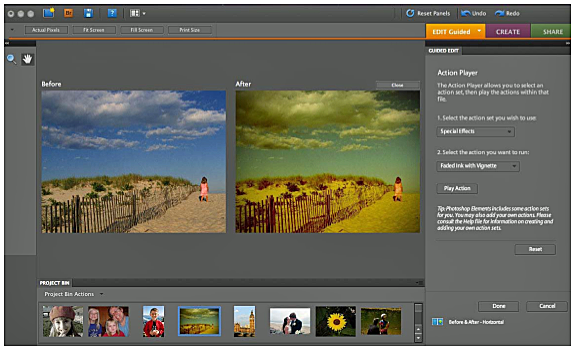
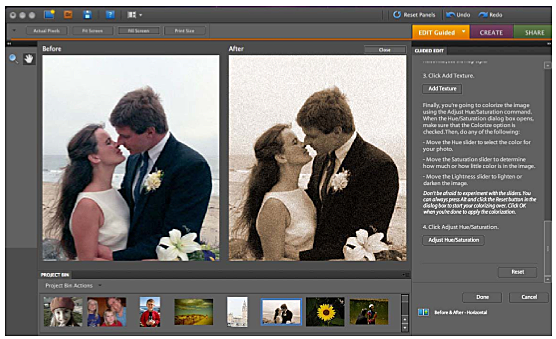
Like line art? I do. With PSE 8.0’s new Photographic Effects feature under Guided Edit, you’ll find step-by-step instructions that make it quick and simple to transform a photo into a line art illustration.

You can also use the Photographic Effects feature under Guided Edit to instantly give your photo an old fashioned look, including a variety of fine-tuning adjustments like Adjust Tonality, Add Texture, and retro colorization.
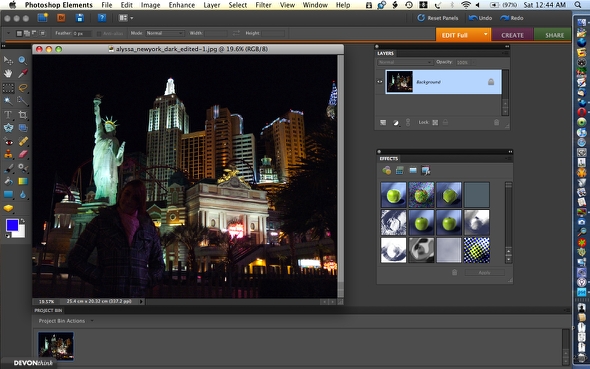
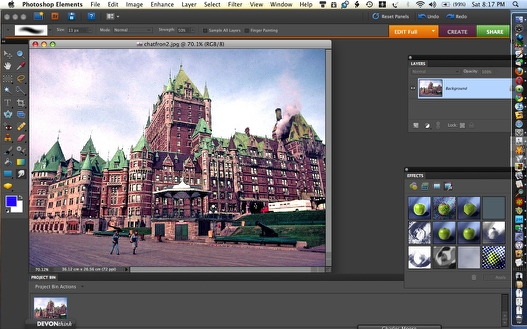
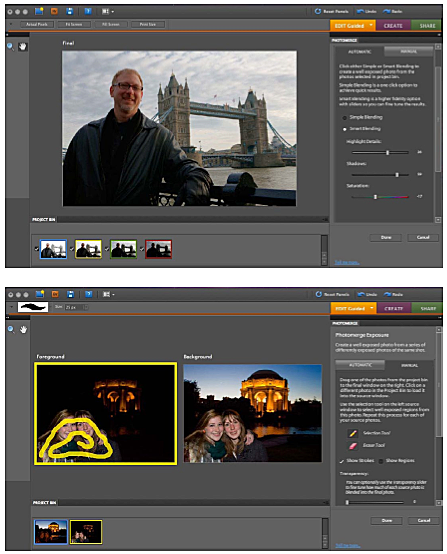
PSE 8.0 has a new Full Edit mode with an array of powerful but easy-to-use tools for correcting color and lighting, fixing photo defects, making selections and creating special effects, adding text, and painting on your photos. You can limit application of these effects to a specified a section of your image using the new 2-in-1 Smart Brush which can with a single stroke select an area and simultaneously apply effects from eight libraries of more than 50 selections. The Smart Brush editing tool is nondestructive and creates layers for each adjustment you make. These adjustment layers keep all of the changes in a separate layer above the original picture, so the original photo is never altered. The Layers palette shows each adjustment layer as it is added to the photo.
Adobe’s patented Photomerge allows you to combine the best of two or more photos, and Elements 8 extends the Adobe Photomerge family of features so you can clean a scene of unwanted elements and get optimized lighting from photos with different exposure values. If you weren’t able to get ideal exposure for all parts of your photo in one shot, you can take a series of photos and let Photomerge Exposure automatically combine them into a perfectly lit photo that looks like what you actually saw but had difficulty capturing in a single shot.
Panorama
Another Photomerge feature, “Panorama”, stitches together multiple photos panned across a scene into a single seamless panorama - automatically. In Photoshop Elements 6, and carried over with version 8, Photomerge Panorama is enhanced, making it easier than ever to blend together your favorite landscape shots, featuring new detection and blending algorithms, so you have the choice of four completely automated ways to create seamless panoramas that don’t require any manual adjustments or fine tuning.
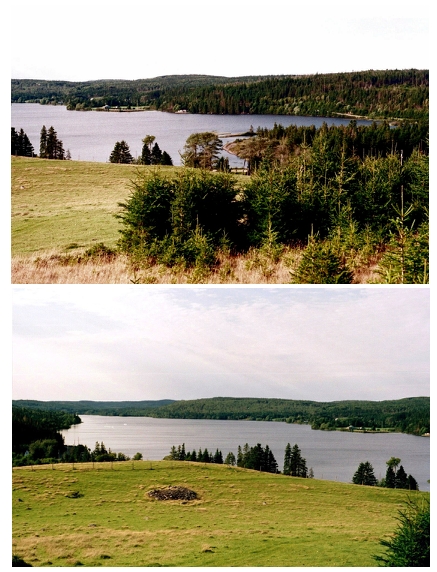
For example, I started with these two shots of the lake my house is situated on (although you don’t have to limit yourself to two).
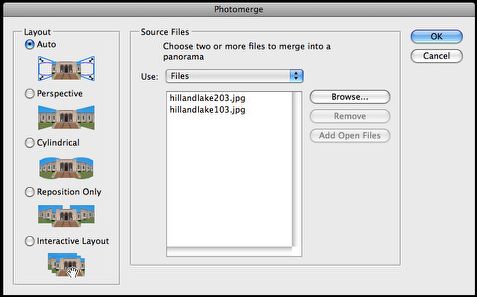
I used the Photomerge dialog to select the two source jpgs from the Finder, and chose “Auto” as the panorama mode I wanted to use, then hit OK and let the Elements magic do its stuff.
The PhotoMerge routine produced this composite image.
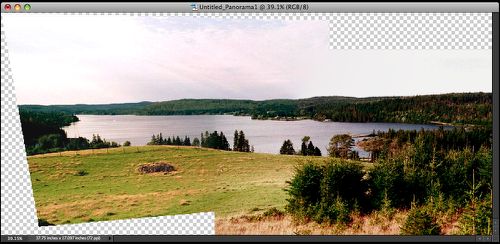
Pretty amazing, I think, -- almost magical, and that’s just a basic simple merge of two photos. Photomerge Panorama offers an array of tools and effects you can use to manipulate your panorama.
I then cropped out the largest possible rectangular composition from the merged image, and voila! You really can’t detect that it’s a composite shot.

For some perspective on just how cool and time-saving this is, here’s the best I could previously manage manually merging the same two photos using Color It! 4.5.

Elements even did a much nicer job of rendering the sky in the automatically merged panorama.
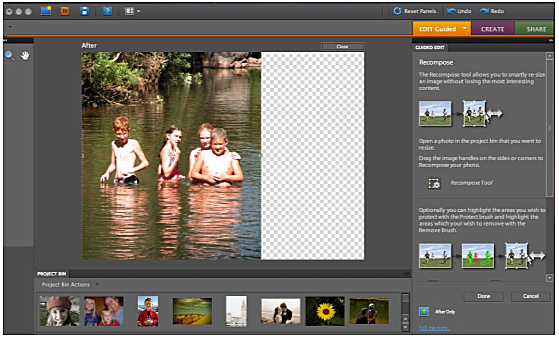
Recompose
Also new to Photoshop Elements 8 are the Recompose feature, which lets you recompose the key subjects in your photos to fit a specific layout, and a new Surface Blur feature that also helps especially in portrait work. Sometimes you need change the size or orientation of a photo to fit a certain frame, and cropping doesn’t quite do the job to get the size just right, while traditional resizing can distort your subjects. Now you can quickly resize and even go from landscape to portrait or vice versa without distorting key subjects like people or buildings. Recompose automatically crops out unimportant areas, and will also remove specified unwanted objects.
Another new PSE 8.0 feature lets you quickly soften surfaces while keeping edges and details crisp with a Surface Blur filter that’s also especially useful for portrait shots. Enhanced is version 8.0’s facility to apply themes, artwork, and templates in creating professional-looking layouts for scrapbooks, photo books, greeting cards and so forth.
And of course the already rich feature set from Photoshop Elements 6.0 is carried over pretty much intact (when it hasn’t been enhanced and/or improved) in Elements 8.0. For descriptions of carryover features, https://www.macprices.net/columns/hildreth_moore/pse6.shtml
Black & White Conversions
I love black and white photos. Back in the ‘70s, I spent a lot of hours in darkrooms, and even had my own makeshift one set up in a spare bedroom for a while. In terms of creativity and artfulness, I prefer black and white to color, and of course the master of B&W art was the great Ansel Adams who has inspired millions with his breathtaking black and white landscape photography of the American West and South during the mid-20th century, mostly using 8x10” negative size view cameras with much of the creative process done in the darkroom.
While it doesn’t offer the same level of control as a real darkroom, using Photoshop Elements and a digital camera you certainly can create black and white photographic art. Most bitmap graphics applications can convert colored or grayscale images to black & white, but Elements 8.0 takes you well beyond basic desaturation to deliver an interactive workspace for creating black and white photos without the need of working in the dark or with trays of smelly chemicals, having to wash and dry prints, and so forth.
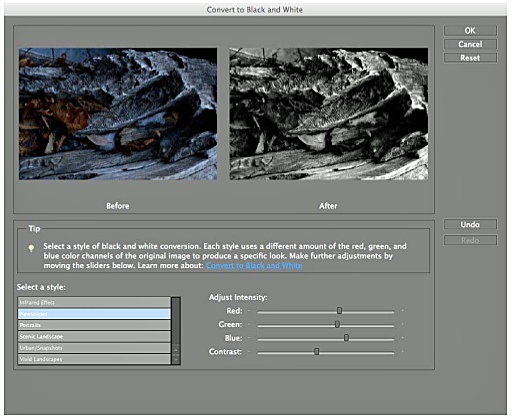
PSE 8’s Convert To Black And White command makes the conversion process quick, easy and even fun by letting you choose a specific conversion result, unlike the Remove Color command, which automatically converts to black and white for you.
In the Convert To Black And White dialog box, you compare and choose different conversion presets represented by image styles. Select a style and then use the available sliders to fine-tune the conversion with adjustments reading out in real time.
You can move the Red, Green, and Blue sliders, as well as the Contrast slider, to suit your preferences -- subtle adjustments are all that is needed here. Use the Before and After images to see the dramatic results your changes produce. The interesting thing for many users is how much you can change the look and character of a black & white photo using color adjustments, although this is familiar old hat to us grizzled veterans of film photography with our collections of colored lens filters for b&w work, for example red filters to create dramatic sky effects.
Back On The Bridge
Returning to the Bridge CS4 helper application, it includes several panels that help you find and preview your photos, review associated metadata, and so forth. You can tag photos with custom keywords; sort them by name, date, or rating; and apply labels for better control over a growing photo library You can use any of the pre-defined arrangements of the Bridge’s panels - called Workspaces - by clicking the numbered Workspace buttons in the lower right hand corner of Bridge, or create your own custom Workspace by hiding the panels you don’t use. You can also transfer photos from your digital camera’s memory card to your computer quickly and then let Photoshop Elements automatically copy them to your preferred storage area, rename photos as they download, and automatically tag photos with your name and copyright.
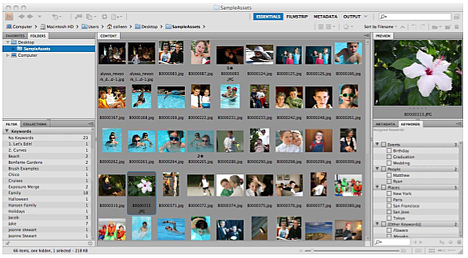
Another Bridge feature, called “Stacks,” lets you dispense with iPhoto and organize your photos into stacks of images. Stacks let you keep each series of photos in a single spot in Adobe Bridge for Photoshop Elements, making it easier and faster to find the photos you want, since stacks reduce unwanted clutter.
Bridge Keywords are words that help you categorize and find photos in ever-growing photo libraries. You can use the Keywords panel, located on the right side of Bridge (in the default Workspace layout), to easily add keywords that represent favorite people, places, or events, and assign them to photos. You can instantly view every photo taken of a person, place, or event by simply filtering on one or more keywords.
You can also employ a feature called Collections, which lets you save groups of favorite photos as as a Collection for quick access and viewing, o to gather together photos you want to use in a project. An example of how you might use Collections would be if you have several cameras, you can segregate your library based on the camera you used to capture your shots.
With Bridge, you can flip through photos in full screen mode, rate your favorites, rotate them, or just view them in a full-screen slide show.
However, you don’t have to use, or even start up the Bridge in order to use Elements 8, and if you prefer to store and organize your images in iPhoto or even in a Finder folder, you can continue to do so. You can set Elements as your Mac’s default photo-editing program in iPhoto’s General Preferences tab.
So, if you already have Photoshop Elements 6.0, which is still a very formidable image editing program, should you upgrade to this new Version 8.0? Well, If you’re running Snow Leopard, absolutely. If you’re still using Leopard or Tiger, it really depends on how much you relish version 8.0’s enhanced feature set, which is something for you to decide. Since it’s been about two years since the last Photoshop Elements upgrade, so making a move is quite reasonable, and will also have you better prepared to upgrade to Snow Leopard, which most of us will inevitably do.
Photoshop Elements 8 is available in versions for both Mac and Windows with a MRSP of $99.99.
For more information, visit:
http://www.adobe.com/go/photoshopelements
Note: Letters to PowerBook Mystique Mailbag may or may not be published at the editor's discretion. Correspondents' email addresses will NOT be published unless the correspondent specifically requests publication. Letters may be edited for length and/or context.
Opinions expressed in postings to PowerBook Mystique MailBag are owned by the respective correspondents and not necessarily shared or endorsed by the Editor and/or PowerBook Central management.
If you would prefer that your message not appear in PowerBook Mystique Mailbag, we would still like to hear from you. Just clearly mark your message "NOT FOR PUBLICATION," and it will not be published.
CM