Taking Your Photos Digital With A PowerBook And Konica/Minolta's Dimage 5400 Elite Film Scanner
by Charles W. Moore
Digital photography has revolutionized the way we take pictures. I still love my faithful old Olympus OM-1 35 millimeter single lens reflex rig, but these days I do most of my photography with a couple of digital cameras. The cost of film and photofinishing has become so astronomical that you don't have to shoot and process a whole lot of rolls before you've equalled the purchase price of a decent digital camera, and of course you get the photos as quickly as you can download them to the Mac.
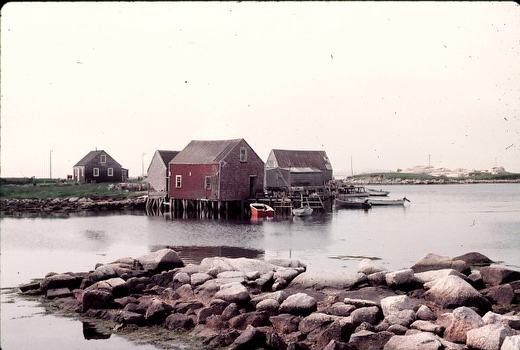
However, a lot of us who have been shutterbugs since long before digital photography was developed have large collections of film photographs — slides, negatives and prints. I have somewhere between 1,000 and 2,000 slides archived, and although my trusty old GAF slide projector that I bought used for $50 back in 1974 still works, the ability to digitalize the photos opens up a whole new dimension. Then there are countless prints and negatives, some of the latter which I never got around to printing back in my darkroom days.
While the Kodachrome slides in my collection still look great, the Ektachrome (and other E6 process clones), and some of the the Agfa, GAF, Eastman 5247, and other process transparencies are beginning to fade and color shift after in some cases more than 30 years of storage. The solution is to scan the film photos into digital images, which will arrest further deterioration, in most cases facilitate restoration, and also color and contrast correction and removal of imperfections like dust specks so the old photos look better than ever with just a few mouse clicks in Photoshop Elements.
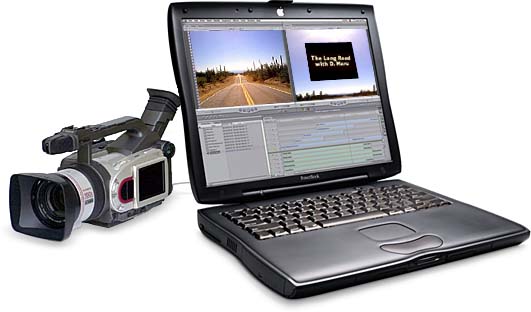
Happily, there is a great selection of photo scanners available. For my 35 mm slide and negative collection, I've been primarily using a Konica/Minolta Dimage 5400 Elite Film Scanner, which has proved a very slick tool for digitalizing my old and not-so-old film photos. Combined with my G4-upgraded Pismo PowerBook and digital image editing software, It's like having an electronic photofinishing lab.
The DiMAGE Scan Elite 5400 uses a 5300-pixel, 3-line CCD to achieve an impressive image resolution of 5,400 dpi. There is also an optical lens system of eight lenses in four groups which allows the DiMAGE Scan Elite 5400 to capture images suitable for creating up to full-frame 24" (60 cm) photo-quality prints.
With 16-bit A/D conversion that can distinguish 65,536 tonal gradations for each color channel, the DiMAGE Scan Elite 5400 can reproduce rich variations in tone and color from the original film image.
With high speed film, the grain of the film itself can be quite noticeable in images. The Scan Elite 5400's Grain Dissolver function helps reduce this graininess, allowing a smooth creation of scanned images at the full resolution capacity of 5,400 dpi. The DiMAGE Scan Elite 5400 also incorporates Digital ICE technology that allows you reduce the affects of dust and scratches as well as other surface contamination such as fingerprints. Automatic Pixel Polish image-processing corrections for color, exposure, and scene selection are made by clicking on the parameters which best describe the picture; the bundled DiMAGE Scan Utility software will instantly show the result. Pixel Polish can also restore faded colors on film, and check the restored image using a real-time simulation.
In addition to the autofocus functions, the DiMAGE can be manually focused. To complement the software control, a large manual focus dial allows fine adjustments.
Actually, there are two scanner software utilities included with the Scan Elite 5400. For most of my scanning I've found the Easy Scan Utility very useful and quick. Just select the film type color/black & white; negative/positive; choose the pictures to be scanned, and how the images are to be used; the scanner will do it stuff. Automatic image processing can also be applied. This basic scanning works well for me since I prefer to do most of my image correction in Adobe Photoshop Elements, which comes bundled with the Scan Elite 5400.
The DiMAGE Scan Elite 5400 is connected to the computer (Macintosh or Windows) using a FireWire or USB 2.0 interface. I use FireWire, since none of my Macs support USB 2.0. Included are USB and FireWire cables of apparent high quality and generous length.
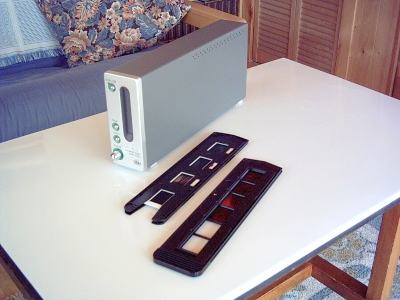
To scan slides or negative filmstrips in the DiMAGE Scan Elite 5400, the photos are inserted in film holders, which can respectively accommodate four slides and six-image negative strips. An Advanced Photo System slide compatible film holder is optional. Based on the designs used with Minolta's top-of-the-line DiMAGE Scan Multi Pro, the Scan Elite 5400's film holders use a hinged cover to hold 35 filmstrips and mounted slides, APS mounted slides, and 35mm negatives and print sleeves. Additionally, the slide mount holder allows a single slide (the last of the four) to be changed without having to eject the holder from the scanner.
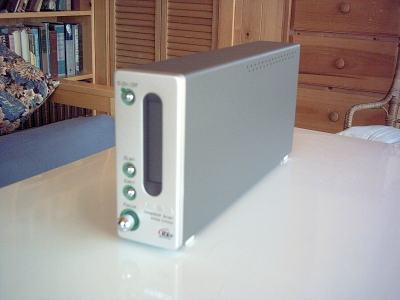
The DiMAGE Scan Elite 5400 looks, feels, and works like the fine piece of high-end digital photographic equipment it is. The first impression upon opening the box is how surprisingly compact this scanner is (2.6 x 6.5 x 14 inches/5.5 lb). You can pick it up and carry it around with one hand - something you wouldn't want to do with a flatbed scanner. It's not intended as a portable device, but this scanner will fit in many computer bags and backpacks, and could serve as a compliment to a PowerBook or iBook as part of a mobile film scanning lab.
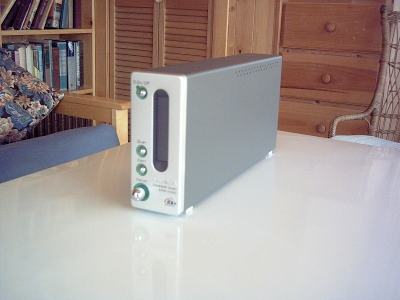
Konica/Minolta is a long-established camera and photographic hardware company, and the 5400's case is all-metal and very conservatively styled; elegantly minimalist by computer peripheral standards. No plastic; no techno avant-garde pretensions. Just a subdued and tasteful businesslike appearance. On the front of the case, flanking the film holder insertion slot, are just four round chrome buttons: on/off, manual scan, film holder eject, and a manual focusing knob. Aside from the on/off button, these are not likely to get used a great deal because the Scan Elite 5400 is intended to be mainly software-controlled.
The back of the case is even less cluttered, with just the USB 2 (also USB 1.1 compatible) and FireWire ports, which have soft rubber blanking plugs for storage/travel and when not in use, and the power adapter jack. That's it.
I like the scanner's small footprint, and there is a funky little plastic scanner stand included which is intended to increase stability, and also has a central hole that looks like it could serve as an anchor point for swivel mounting. The main case also has rubber feet.
The first order of business before using the Scan Elite 5400 is to install the scanner software. As noted, the scanner comes bundled with two scanning software programs, and I also tested it with the third-party VueScan scanning software from Hamrick Software. The DiMAGE software supports both OS X (10.1.3 up) and OS 8.6 - 9.2.2.
Installing the DiMAGE scanning software package proved straightforward, and VueScan (which can support the Scan Elite 5400 without other software) is simplicity itself to install. The version of DiMAGE Scan that came bundled with the test unit was 1.1.0, but the latest version 1.1.5, which is downloadable from the Konica/Minolta Website here in seven segments of 2.25 MB each.
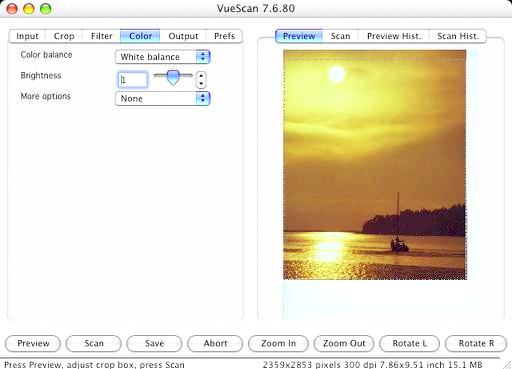
As noted above, the DiMAGE Easy Scan Utility is a simple, basic, automatic scanning application for no-hassle, quick scanning jobs. It is a stand-alone program and very slick and convenient for tasks that don't require a lot of image correction and manipulation, or where you will be taking the image into a program like Photoshop for final tweaking. DiMAGE Easy Scan does, however, support Applied Science Fiction’s Digital ICE technology which automatically reduces the appearance of dust and scratches as well as other film surface contamination such as fingerprints. Note the big dust speck marring this otherwise nice sunset shot:

It's gone after scanning with Digital ICE:

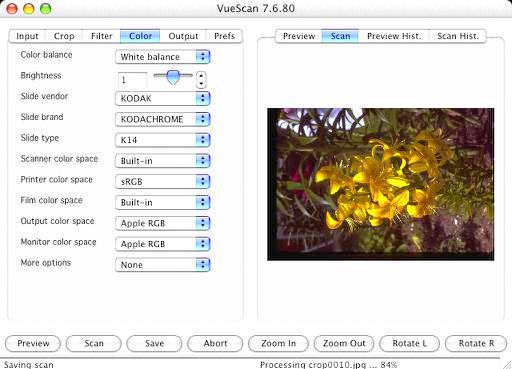
Check out the speckled sky in this shot:
Here it is after Digital ICE worked its magic:

Note that Digital ICE also only works with non-Kodachrome color images except for a few specialized black-and-white films that are developed using the color C-41 process.
The Grain Reduction function reduces the effect of film grain in the scanned image, and there is both automatic and manual image/color correction. For many users, Easy Scan will do the job nicely in a few simple steps.
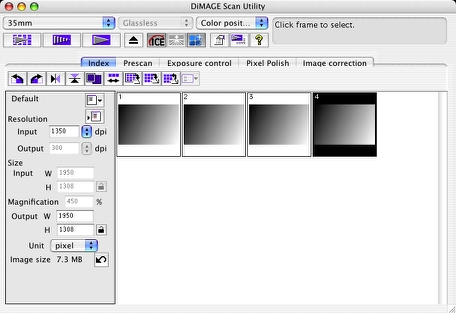
1. Insert the film holder, choose a film type, and perform an initial index scan.

2. Select an image to be scanned from the thumbnail index that appears.
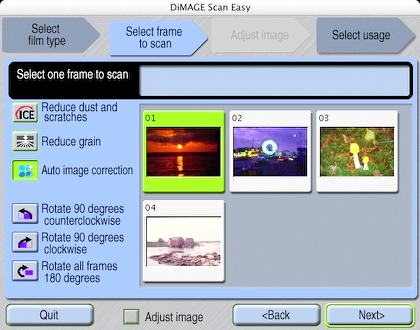
3. Select the desired image adjustment options and/or perform image correction in the Adjust Image window, with live update.
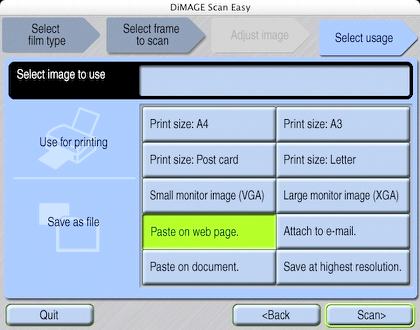
4. Select the image output size and resolution from the 10 options provided.
5. Name your image file and type in the save dialog and click the Save button. Your image is scanned and saved to disk.
For more advanced scanning, the DiMAGE Scan utility provides more functions and a much wider range of user control than Easy Scan does, and can be run as a standalone application or from a program that supports Photoshop-style plugins, a such as Adobe Photoshop 6, Photoshop 7, and Photoshop Elements. The Scan Utility does everything it that Easy Scan does, and much more.
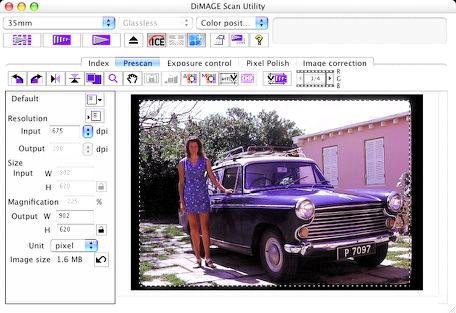
Indexing and prescanning are similarly straightforward, but the cropping and magnifying tools are more powerful and there are more image correction options; Digital ICE and image/color correction of course (however note that the Digital ROC and Digital GEM functions in Scan Utility are not supported by the Scan Elite 5400).
There is also the Grain Dissolver function, which helps reduce film graininess, allowing a smooth creation of high-quality scanned images at the full resolution capacity of 5,400 dpi. When a precise level of graininess is important, Digital ICE can be used to achieve the desired result.
The Pixel Polish feature works with color images. Automatic image-processing corrections for color, exposure, and scene selection are made by clicking on the parameters which best describe the picture; the DiMAGE Scan Utility will instantly show the result. Pixel Polish can also restore faded colors on film, and check the restored image using a real-time simulation.
Automatic image-processing corrections are made by clicking on the parameters which best describe the picture such as backlit, nighttime, etc.; the DiMAGE Scan Utility will instantly show the result. For critical control over image sharpness, the scanner can be manually focused using the Focus knob. A large manual focus dial on the scanner unit allows fine adjustments to be made.
Scan Utility allows you to compare pre and post correction images side by side, and to undo or redo image corrections before final scanning, and offers a comprehensive range of input and output resolution options.
The DiMAGE Scan Launcher utility that installs with the scanning applications makes choosing among Easy Scan, DiMAGE Scan Utility, or the Batch Scan Utility included in the software package that allows large volumes of film to be scanned without having to make individual settings for each image. By simply pressing the scan button on the front of the DiMAGE Scan Elite 5400 a user can activate the utility for each batch of film.
The scanner’s Quick Scan function makes initializing the scanner and software as easy as pressing a button, and permits the selection among the standard DiMAGE Scan Utility, the Easy Scan Utility, or the Batch Scan Utility as well as setting a short cut to a specific application.
My main complaint about the DiMAGE Scan software is that its user interface is plug-ugly in a typically Windows-esque sort of way, in contrast to the tastefully elegant appearance of the unit itself.
Using VueScan with the DiMAGE Scan Elite 5400 is somewhat different, and offers certain features and capabilities that aren't available with the DiMAGE Scan Utility (and vice-versa). VueScan's interface is no-nonsense spartan, but more Mac-like in appearance than the DiMAGE Scan software's
Power up the scanner, start VueScan, and once the scanner has initialized, insert the film holder into its slot.
Set "Input/Media type" in the pull-down menu -- ie; prints, slides or negatives. If you're in scanning slides made, choose Kodachrome for K14 process slides, and Ektachrome for Kodak and other brands of E6 process slides.
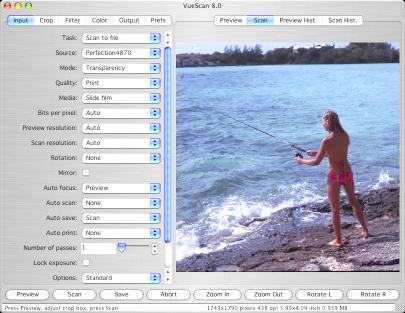
Press the "Preview" button and the scanner will preview your image, which will appear in the right hand pane of the VueScan interface window after Vuescan processes the scanned data. A text readout in the bottom field of the interface window keeps you apprised of scanning and processing progress.
Once the preview image appears, use the crop box to specify the desired crop of your scan.
When all is to your liking, press the "Scan" button. The scanner will do its stuff, and after another processing interval, a scan of the image will appear in the window. Click "Save" to save it to your hard drive or open it in an image editing/viewing application. VueScan can save scanned images as JPEG files (by default) or TIFF files (optionally).
VueScan also supports batch scanning. For more information on that, see:
http://www.hamrick.com/vuescan/html/vuesc3.htm#topic2
Vuescan can color-correct scans from photographic images by referencing profiles for over 200 different types of color negative film and four types of slide film, and can also color-correct raw data based on profiles for your particular scanner, as well as allowing for a wide range of manual adjustments, and VueScan is engineered for crop and white-balance accuracy to minimize the amount of manual post-scan adjustment necessary, which will be especially appreciated when scanning batches of images using the "Input/Batch scan" option.
VueScan supports various processing algorithms such as dust removal, grain reduction, color restoration, and sharpening. Using VueScan with the DiMAGE Scan Elite 5400, you can select the Grain Dissolver option, which causes a translucent material to be inserted in the light path to make the light source more diffuse, slightly reducing the appearance of film grain at the cost of longer scan times. VueScan supports a scanner's hardware features such as batch scanning, auto-focus, infrared channels for dust and scratch removal, and multi-scan to pull the full bit depth of data from dark areas of slides.
For more information on VueScan or to download a demo, visit:
http://www.hamrick.com/index.html
However, while the Scan Elite 5400 does a wonderful job of image restoration, its main purpose is for photographers who need a high-resolution, advanced production film scanning capability.
Scanning film is fun, and can be a very satisfying exercise, but it does tend to be time-consuming. Film scanners take some time to load, initialize, and scanning itself isn't exactly speedy. Konica/Minolta says that scanning color slides with no autoexposure, no image correction, at 5400 dpi 8 bit scans using a 1 GHz G4 Macintosh in OS X 10.2 with 1 GB of RAM via FireWire, takes 16 seconds for an index scan, 12 seconds for a prescan, and 69 seconds for a final scan. I of course found correspondent times somewhat longer using a 550 MHz G4 PowerBook with 640 MB of RAM running OS 10.3. (The minimum supported system is a G3 CPU with 128 MB of RAM.)
But even with a fast machine, production scanning will involve a lot of waiting, and one area where the DiMAGE Scan Elite 5400 compares unfavorably to dual-purpose flatbed/film scanners is that the latter can load and batch scan a much larger number of images at a time, and are not slowed down by the mechanical film loading and transport mechanisms of the DiMAGE Scan Elite 5400. On the other hand, the dedicated film scanner is a more powerful and precise instrument when scanning quality and high resolution are paramount concerns.
While the Scan Elite 5400 is easy to use, its relatively high price (List $1,099, available online at Wolfes for $ 699.99) and lack of hard copy scanning ability (i.e.: flatbed) will limit its appeal to many consumer users, but for advanced amateur photographers and small-office photography professionals who work with 35mm and or APS film format, it should strike a reasonable balance between price and high-resolution performance. And indeed, if you're a consumer/hobbyist with a large collection of 35mm slides and/or negatives you want to digitalize, the Scan Elite 5400 will prove a user-friendly and efficient tool for the job if you can handle the price of entry.

The Konica/Minolta DiMAGE Scan Elite 5400 35mm film scanner won the European Technical Image Press Association (TIPA) Award for “Best Film Scanner” for the year 2003-2004.
According to TIPA, the award went to the Konica/Minolta DiMAGE Scan Elite 5400 because of its “unprecedented optical resolution of 5400 dpi” and “combined with its very high optical density, effective Digital ICE removal of dust and scratches, and the unique propriety grain reduction.” TIPA also said, “This scanner delivers excellent scans for a very affordable price.” The TIPA jury said it had no difficulty choosing it as the “Best Film Scanner 2003/2004”.
I kind of have to agree. This is an extremely attractive product that is a pleasure to use, although the "affordable price" evaluation is relative to one's perspective. And after a year of service and scanning a thousand or so slides and negatives with the Scan Elite 5400, I can vouch for its reliability. It has been completely trouble-free since the first scan.
For more information on the Konica/Minolta DiMAGE Scan Elite 5400, visit:
http://konicaminolta.com/
US:
http://www.minoltausa.com/
Canada:
http://konicaminolta.ca
Next time, we'll take a look at scanning with an iBook and a high-end consumer flatbed photo and film scanner - the Epson Perfection 4870 Photo.
DiMAGE Scan Elite 5400 Specifications And System Requirements
Type - 35mm film scanner
Film type - Color/Black & White, negative/positive
Optical resolution - 5400 dpi
Scanning dimensions - 24.61 x 36.69mm
Maximum pixel dimension: 5232 x 7800 pixels
Scanning method - Moving film, fixed sensor, single-pass scan
Image sensor - 3-line primary-color CCD with 5300 pixels per line
Multi-sample scanning - 16x, 8x, 4x, 2x, Off
Holder operation - Auto loading
Continuous scanning for multiple frames.
A/D conversion - 16-bit
Color depth - 8-bit and 16-bit per color channel
Dynamic range - 4.8
Computer interface - IEEE1394 (FireWire) / USB 2.0 (1.1 compatible)
Focusing
Autofocus, Point AF, Manual focus
Light source - Cold cathode fluorescent tube
Power requirements - 100-120 V AC, 50/60 Hz for North America (With the supplied AC adapter.)
Power consumption - Maximum 30W ENERGY STAR compliant
Dimensions (WxHxD) - 2.6 x 6.5 x 14 inches (65 x 165 x 360mm)
Weight of scanning unit - Approximately 5.5 lb. / 2.5 kg
Standard accessories:
35mm-film Holder FH-M10, Slide Mount Holder SH-M10, USB
Cable, UC-2, IEEE1394 Cable FC-2, AC Adapter AC- U25,
DiMAGE Scan, Photoshop Elements 2.0, Stand ST-M10, Reset tool RT-M10
Minumum System Requirements for Apple Macintosh computers
CPU - PowerPC G3 or later processor (*3)
Operating systems - USB: Mac OS 8.6 to 9.2.2, Mac OS X v10.1.3 to 10.1.5,
and v10.2.1 to 10.2.3 / IEEE1394 (FireWire): - Mac OS 8.6 to 9.2.2 and v10.2.1 to 10.2.3
RAM (*1) - 128 MB of RAM in addition to the requirements for the
Mac OS and applications (*3)
Hard-disk space - 600 MB of free hard-disk space (*3)
Monitor - 800x600 monitor capable of displaying 32,000 colors. 1024x768 or greater recommended.
Tested applications (*2) - The plug-in driver software has been tested for use with:
Adobe Photoshop (v 6.0.1 and 7.0)
and Adobe Photoshop Elements 2.0.
Recommended interface (*2) - FireWire port supplied by Apple Computer, Inc / USB port supplied with computer
(*1) The CPU and RAM must satisfy the requirements of the operating system
(*2) The application software and interface must be guaranteed by their respective manufacturers to work with the operating system.
(*3) Digital ICE and Pixel Polish system requirements:
Macintosh: PowerPC G3 or later processor (PowerPC G4 or later recommended);
256MB of RAM in addition to the Mac OS and applications (512MB or more recommended);
1.2 GB of free hard disk space (2 GB or more recommended)